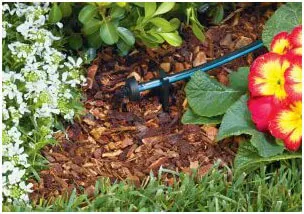
 This guide provides a concise overview of drip irrigation systems tailored specifically for large planter gardens, highlighting their efficiency in delivering water directly to plant roots while minimising waste. In Australia’s diverse climate, where gardens face challenges from heat and unpredictable rainfall, a reliable irrigation system is vital for maintaining healthy plants. Drip irrigation not only conserves water but also enhances nutrient absorption, leading to robust growth in your planters.
Whether you’re an experienced gardener or just starting, this ultimate guide will walk you through the benefits of drip irrigation, the necessary components for installation, and step-by-step instructions for setting up your own system in planters. We’ll also cover maintenance tips to ensure your system operates effectively.
Advantages of Drip System for Potted Plants
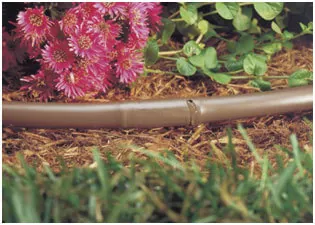
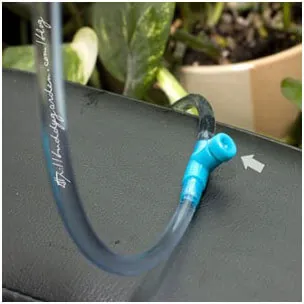 A drip irrigation system for planters consists of hoses with small holes drilled into them, allowing water to be delivered slowly and steadily to the plants. This method ensures that plants receive just the right amount of this precious resource. Unlike traditional watering systems, drip irrigation is an environmentally friendly choice that conserves water while also saving time and effort. Many gardeners now prefer drip irrigation because it can transform any garden into a beautiful oasis with minimal effort, reduced time commitment, and lower water consumption.
By adopting a drip irrigation system, you can enjoy the benefits of efficient watering while promoting sustainable gardening practices.
Conserving Supplies of Clean Water
In today’s world, clean and healthy water is an increasingly precious resource. As the global population grows, water shortages are becoming more frequent. Given these circumstances, it’s crucial to adopt systems that conserve this vital natural resource. The primary advantage of drip irrigation for planters is its ability to deliver precisely the right amount of water to each potted plant. This precision prevents both overwatering and under watering, ensuring optimal growing conditions for your plants.
Key Benefits:
- Targeted Watering: Each drop of water goes directly into the soil.
- Minimal Waste: Water is not lost through evaporation or surface runoff.
- Ideal Conditions: Plants receive optimal watering without wasting resources.
By using a drip irrigation system, you can provide your plants with ideal watering conditions while significantly reducing water waste. This approach not only benefits your garden but also contributes to broader water conservation efforts, making it an environmentally responsible choice for gardeners.
Combat Fungal Diseases
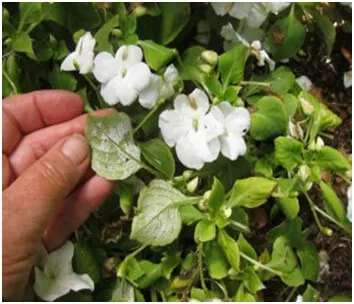 Many fungal diseases that affect plant leaves thrive when water remains on the foliage for extended periods without drying. This is a significant drawback of traditional sprinkler systems, which inevitably spread water over a large surface area, including plant leaves.
Drip irrigation systems offer a superior solution to this problem:
- Targeted Watering: Water is delivered directly to the soil and roots.
- Dry Foliage: Leaves remain dry, reducing the risk of fungal growth.
- Improved Plant Health: Minimizes conditions favorable for disease development.
The drip irrigation method is particularly effective in combating fungal diseases because:
- Water slowly infiltrates the soil, feeding the roots directly.
- No water is sprinkled from above, keeping foliage dry.
- Reduces humidity around plants, creating an environment less conducive to fungal growth.
Convenience
Drip irrigation system for planters has a major advantage over other types of systems: convenience. By setting a timer, you can automate the system to water each of your potted plants regularly, without having to lift as much as a finger, something that cannot be said about other watering systems.
 An Ideal Solution for Gardens and Potted Plants
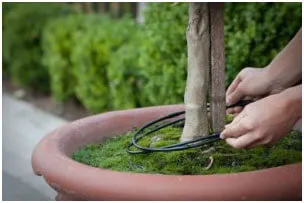
At first glance, one might assume that a drip irrigation system is only suitable for large patches of land. However, this is not the case; these systems can be effectively adapted for small gardens and, especially, for potted plants.
As long as the system is designed with dripping holes positioned next to each plant, ideal watering conditions can be achieved. Potted plants particularly benefit from this type of irrigation, as it significantly reduces the growth of weeds within each garden pot. Weeds can be a persistent issue in large planters, making regular maintenance a challenge.
 Water Slowly Seeps Into the Soil
When plants are grown in containers or well-defined garden areas, relying on weather for watering is not a viable option, even if the pots are left outside. Traditional sprinkling systems and drip trays often lead to water waste and are not very efficient.
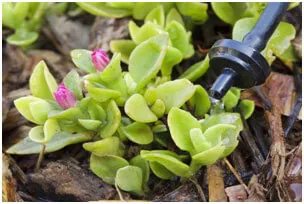
A drip irrigation system allows water to slowly seep into the soil, providing several advantages:
- Precise Moisture Control: Plants receive just the right amount of moisture, preventing the suffocation that can occur with other watering methods.
- Nutrient Retention: The soil retains essential nutrients since water is not poured rapidly through it, which can wash away valuable resources.
- Efficient Water Use: This method ensures that water is used efficiently, minimizing waste and promoting healthier plant growth.
By implementing a drip irrigation system, gardeners can provide the best care for their plants while saving time and effort. This efficient watering method not only supports plant health but also enhances the overall gardening experience.
 They Do Not Encourage Weed Growth
Weeds are a significant problem for many gardeners, as they are unsightly and can suffocate other plants in pots. Traditional watering methods, such as drip trays, often provide excess water that benefits these unwanted guests. Weeds can quickly sprout and take over your garden before you notice, making removal a challenging and never-ending task.
Benefits of Drip Irrigation for Weed Control:
- Targeted Watering: The system feeds water directly to the roots of your desired plants.
- Limited Water Availability: Less water is available for unwanted sprouts in the soil.
- Dry Soil Surface: Creates an inhospitable environment for weed growth.
By using a drip irrigation system, you can more easily maintain a weed-free potted garden, reducing the time and effort spent on weed removal.
They Combat Wet Foliage Diseases
While many consider sprinkler systems a convenient solution for garden watering needs, they have a significant disadvantage: water remaining on leaves promotes various wet foliage diseases.
How Drip Irrigation Prevents Foliar Diseases:
- Direct Root Watering: Water is delivered only to the plant roots, not the foliage.
- Dry Leaf Surfaces: Leaves remain dry, reducing the risk of fungal and bacterial growth.
- Improved Plant Health: By avoiding wet foliage, plants are less susceptible to many common diseases.
Drip irrigation systems effectively combat such diseases by ensuring that water is applied only where it’s needed – at the plant’s base. This targeted approach not only conserves water but also promotes healthier, more disease-resistant plants.
Drip Irrigation System Installation in Your Garden Planters
Hiring a Professional
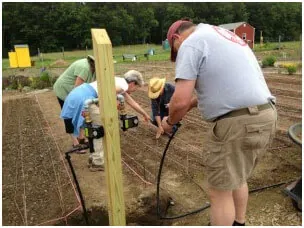 If you are hiring a professional to install your drip irrigation system there are several important factors to keep in mind. A well-designed and properly installed drip irrigation system can save water, time, and effort while promoting healthier plant growth. Here’s what you should consider throughout the process:
Assessing Your Garden’s Needs
Before contacting contractors, take time to evaluate your garden’s specific requirements:
Garden Layout and Size
Measure and map out your planter garden, noting the location and dimensions of each planter. This information will help contractors provide accurate quotes and design appropriate systems.
Plant Types
Different plants have varying water needs. Make a list of the plants in your garden, grouping them by water requirements. This will allow for the creation of separate irrigation zones if necessary.
 Water Source and Pressure
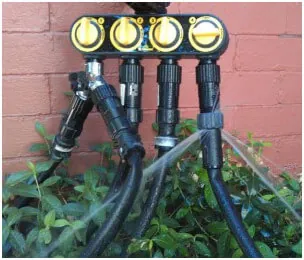
Identify your water source and have information about your water pressure ready. This is crucial for designing a system that functions optimally.
Choosing a Contractor
Selecting the right professional is key to a successful installation:
Experience and Expertise
Look for contractors with specific experience in drip irrigation systems for planter gardens. Ask about their qualifications, certifications, and years of experience in the field.
References and Portfolio
Request references from past clients and examples of similar projects they’ve completed. This can give you insight into the quality of their work and customer satisfaction.
Insurance and Licensing
Ensure the contractor is properly licensed and insured. This protects you from liability in case of accidents or damage during the installation process.
System Design Considerations
A professional should address the following aspects in their system design:
Water Efficiency
The system should be designed to minimize water waste while meeting the needs of your plants. Discuss options for pressure-compensating emitters and smart controllers that can adjust watering based on weather conditions.
Customization
The design should be tailored to your specific garden layout and plant needs. This may include creating separate zones for plants with different water requirements or incorporating adjustable emitters for flexibility.
Expandability
If you plan to expand your garden in the future, discuss how the system can be designed to accommodate growth easily.
Filtration
Proper filtration is crucial to prevent clogging in drip systems. Ensure the contractor includes appropriate filtration based on your water quality.
 Materials and Components
Quality materials are essential for a long-lasting, efficient system:
Tubing and Emitters
Ask about the types of tubing and emitters proposed. UV-resistant materials are important for longevity in outdoor settings.
Controllers and Sensors
Discuss options for smart controllers and sensors that can improve water efficiency and automate the system based on environmental conditions.
Backflow Prevention
Ensure the system includes proper backflow prevention devices to protect your water supply from contamination.
Installation Process
Understanding the installation process helps set expectations:
Timeline
Discuss the expected duration of the installation and any factors that could affect the timeline.
Disruption to Existing Landscape
Ask about how the installation might impact your current garden setup and what measures will be taken to minimize disruption.
Testing and Adjustments
Ensure the contractor plans for thorough testing of the system after installation and is willing to make necessary adjustments.
Maintenance and Support
Consider long-term care for your new system:
Maintenance Requirements
Ask about routine maintenance needs and whether the contractor offers maintenance services.
Warranty and Support
Inquire about warranties on parts and labor, as well as ongoing support for troubleshooting issues.
Training
Request training on how to operate and perform basic maintenance on your new system.
Cost Considerations
While cost shouldn’t be the only factor, it’s an important consideration:
Detailed Quote
Request a detailed quote that breaks down costs for materials, labor, and any additional features or services.
Long-term Savings
Discuss how the system can lead to long-term savings through reduced water usage and improved plant health.
Payment Terms
Clarify payment terms, including any deposits required and the payment schedule.
Environmental Impact
Consider the environmental benefits of your new system:
Water Conservation
Discuss how the system will contribute to water conservation efforts and any local regulations or incentives related to water-efficient irrigation.
Sustainable Practices
Ask about eco-friendly options, such as recycled materials or solar-powered components.
Post-Installation Considerations
Plan for the future of your new irrigation system:
Seasonal Adjustments
Discuss how the system can be adjusted for different seasons and changing plant needs.
Upgrades and Modifications
Consider how easily the system can be modified or upgraded in the future if your garden evolves. By thoroughly considering these factors and working closely with a qualified professional, you can ensure that your new drip irrigation system is well-designed, properly installed, and tailored to the specific needs of your planter garden. This investment will not only save you time and resources in the long run but also contribute to the health and beauty of your garden for years to come.
Installing Your Own Drip Irrigation System
 A drip irrigation system is an efficient and effective way to water your garden, conserving water while promoting healthy plant growth. Installing your own system can be a rewarding DIY project that saves money and gives you full control over your garden’s watering needs. Here’s a comprehensive guide to help you install your own drip irrigation system.
Planning Your System
Before you begin installation, careful planning is essential:
Assess Your Garden
- Measure your garden area and create a rough sketch.
- Note the location of plants, their water needs, and any slopes or obstacles.
- Identify your water source and its pressure.
Design Your Layout
- Plan the main line and branch lines.
- Decide on emitter placement based on plant needs.
- Consider dividing your garden into zones if it’s large or has varied watering needs.
Gather Materials
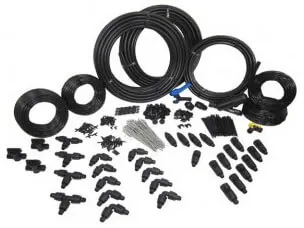
You’ll need:
- Polyethylene tubing (for main and branch lines)
- Drip emitters or drip tape
- Fittings (tees, elbows, connectors)
- Backflow preventer
- Pressure regulator
- Filter
- Timer (optional but recommended)
- Hole punch tool
- Tubing stakes or landscape staples
 Installation Steps
- Install the Main Components
Start at your water source:
- Attach the backflow preventer to prevent contamination of your water supply.
- Connect the pressure regulator to ensure consistent water pressure.
- Install the filter to prevent clogging of the system.
- If using, attach the timer for automated watering.
- Lay Out the Main Line
- Connect the polyethylene tubing to your water source setup.
- Run the main line along the perimeter of your garden or in a central location.
- Use stakes or landscape staples to secure the tubing.
- Install Branch Lines
- Cut the tubing to create branch lines off the main line.
- Use tee fittings to connect branch lines to the main line.
- Secure branch lines with stakes or staples.
- Add Emitters
For individual emitters:
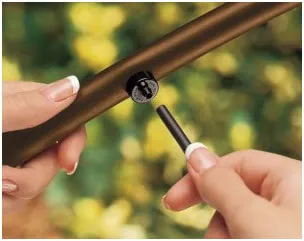
- Use a hole punch tool to create holes in the tubing where you want emitters.
- Insert emitters into the holes.
For drip tape:
- Connect the drip tape to your branch lines using appropriate fittings.
- Secure the drip tape with stakes or staples.
- Cap the Ends
- Use end caps or fold and secure the ends of your tubing and drip tape.
- Test the System
- Turn on the water and check for leaks or blockages.
- Adjust emitter placement if necessary.
- Ensure all plants are receiving adequate water.
Tips for Success
- Use high-quality materials: Investing in durable components will save you time and money in the long run.
- Account for growth: Leave room for plants to grow and adjust your system as needed.
- Mulch: After installation, apply mulch to conserve moisture and protect your irrigation lines.
- Regular maintenance: Flush the system periodically and check for clogs or damage.
Troubleshooting Common Issues
- Clogged emitters: Clean or replace as needed. Ensure your filter is working properly.
- Leaks: Check connections and repair or replace damaged tubing.
- Uneven watering: Adjust emitter placement or flow rates to ensure all plants receive adequate water.
- Low pressure: Check for kinks in the line or consider dividing your system into zones.
Advantages of DIY Installation
Installing your own drip irrigation system offers several benefits:
- Cost savings: DIY installation can be significantly cheaper than professional installation.
- Customization: You have complete control over the design and can easily modify it as your garden changes.
- Learning experience: Gain valuable knowledge about your garden’s watering needs and irrigation principles.
- Satisfaction: Enjoy the pride of completing a project that benefits your garden.
Considerations for Large or Complex Gardens
For larger gardens or those with complex watering needs:
- Zoning: Divide your garden into zones based on plant types, sun exposure, or soil conditions.
- Automated controls: Invest in a multi-zone timer to manage different watering schedules.
- Professional consultation: Consider consulting with a landscaper or irrigation specialist for advice on system design.
Maintenance and Upgrades
To keep your system running efficiently:
- Seasonal checks: Inspect your system at the start of each growing season.
- Winterization: In cold climates, drain the system before freezing temperatures hit.
- Upgrades: Consider adding smart controllers or moisture sensors for even more efficient watering.
Conclusion
Whether hiring a professional or installing your own drip irrigation system, it will be a valuable investment in your garden’s health and water conservation efforts. With careful planning and execution, you can create a custom watering solution that meets the unique needs of your plants while saving time, money, and resources. As you become more familiar with your system, you’ll be able to fine-tune it for optimal performance, ensuring your garden thrives with minimal water waste. Remember, the key to success is in the details – take your time with the planning and installation, and don’t hesitate to seek advice if you encounter challenges along the way. Your efforts will be rewarded with a lush, thriving garden and the satisfaction of a job well done.


Can an irrigation system be used for a short time, such as vacations?
Hi Ethel. Absolutely. That’s the beauty of irrigation systems as they can be turned on and off whenever you like.